contact us

Use the form on the right to contact us.

You can edit the text in this area, and change where the contact form on the right submits to, by entering edit mode using the modes on the bottom right.


123 Street Avenue, City Town, 99999

(123) 555-6789

email@address.com


You can set your address, phone number, email and site description in the settings tab.
Link to read me page with more information.

used - sukasana.jpg

Blog


Yoga for core strength and awareness part 2: your sides (side bends)

Olivia Marley

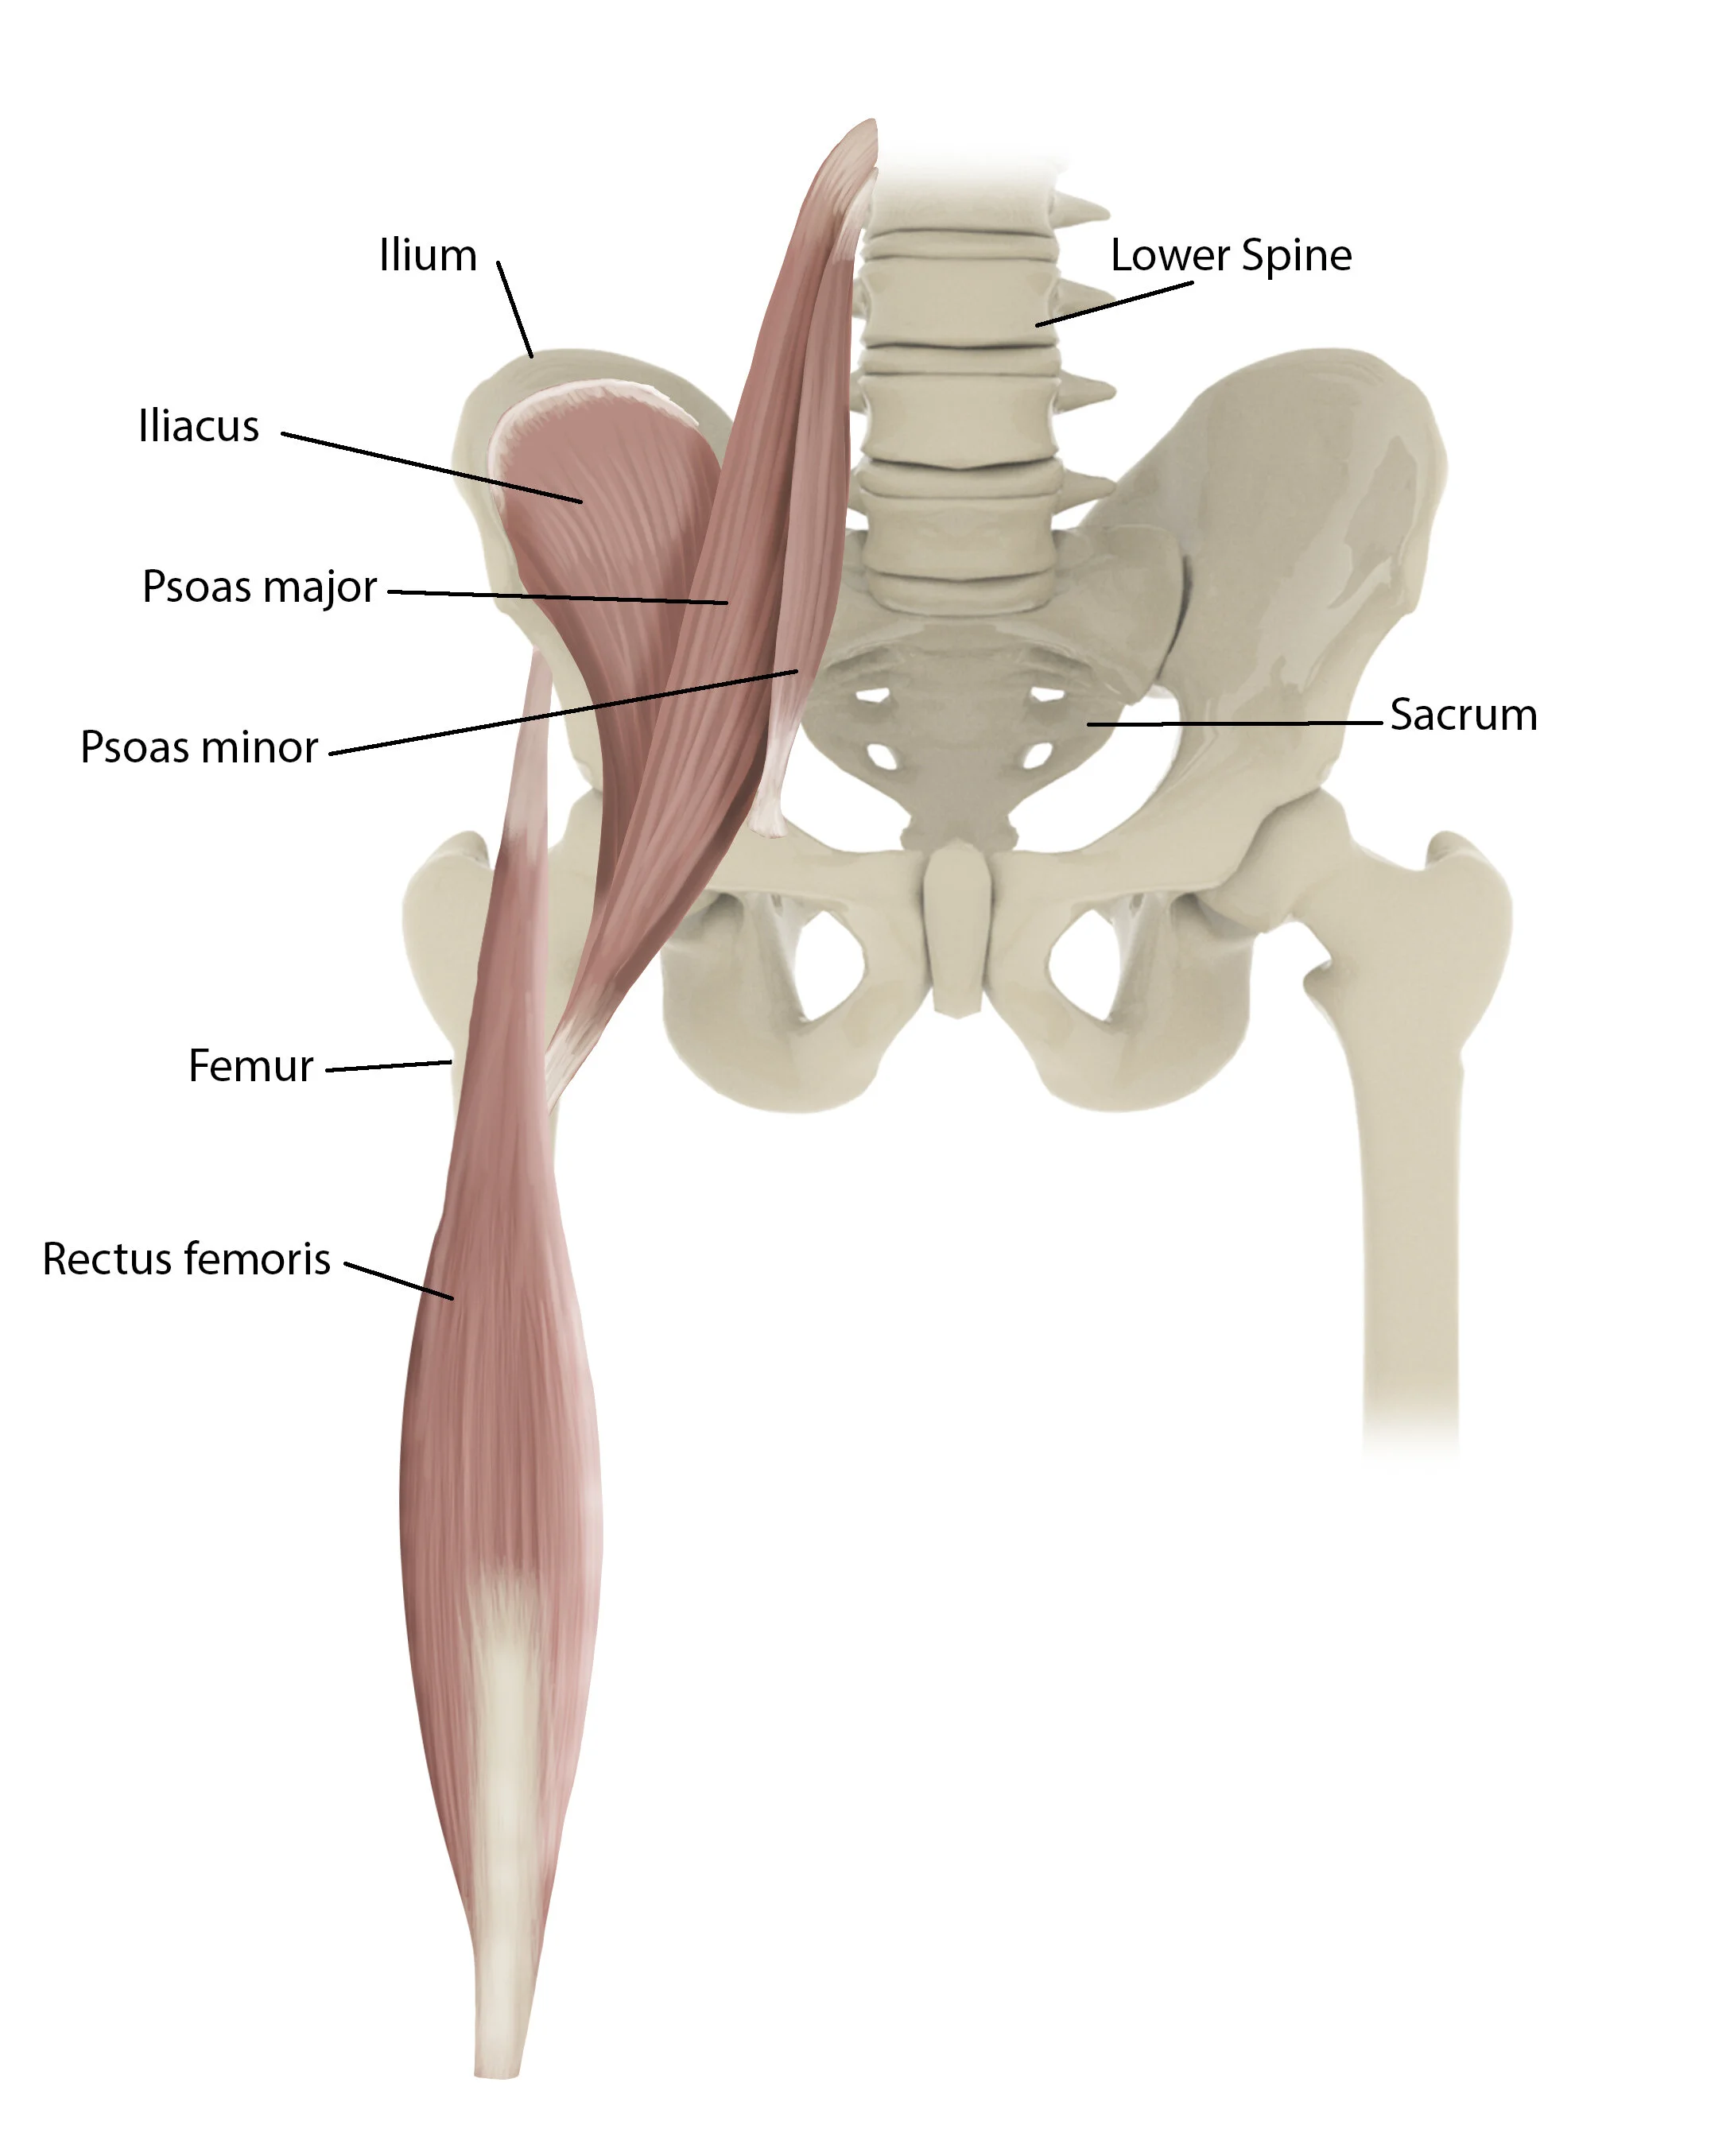
Within our current class theme of ‘core’, this week we’re shifting our attention to your sides (look at our last post for a simple diagram of your core). As with last (and every!) week, our primary focus is on breathing plus also trying to feel the muscles in the sides of your waist working. For this week of study we’re looking primarily at how the some of the muscles in your core can make you bend to the side, and feeling how your outer hips also have a role to play in that motion. 

Here are some of the postures we’re using to feel those tissues working:

IMG_0088.jpg

Side ribs breathing: lie on your back with your knees bent. Put your hands on the sides of your lower ribs, so that your fingers are towards to the ceiling but your thumbs are wrapped around towards the floor. As you inhale try and breathe out into your hands, so that your ribcage pushes your hands further apart. As you exhale feel your ribs and hands sink back towards each other. Repeat.

IMG_0092.jpg
IMG_0095.jpg

Side waist strengthener: lie on your back with your knees bent. Lift your head and shoulders and reach your hands towards your ankles. Feel the front side of your core working to lift your head and shoulders. Take an inhale, then as you exhale reach your right hand towards the front of your mat (to bring yourself into a sideways bend). Inhale come back to centre, exhale reach to the other side. Repeat a few times, concentrating on feeling the side of your waist shortening to make your torso bend sideways as you reach your arm.

IMG_0101.jpg
IMG_0104.jpg

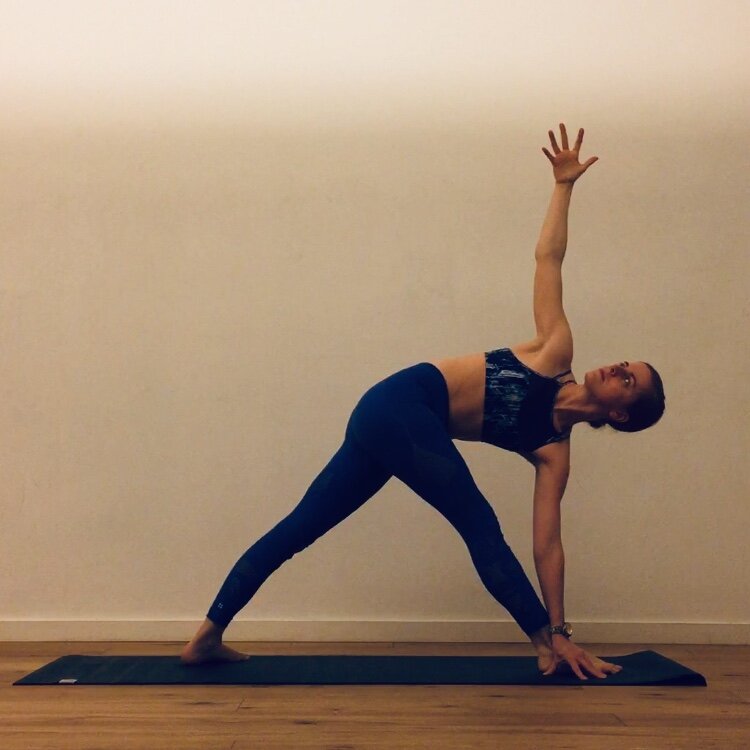
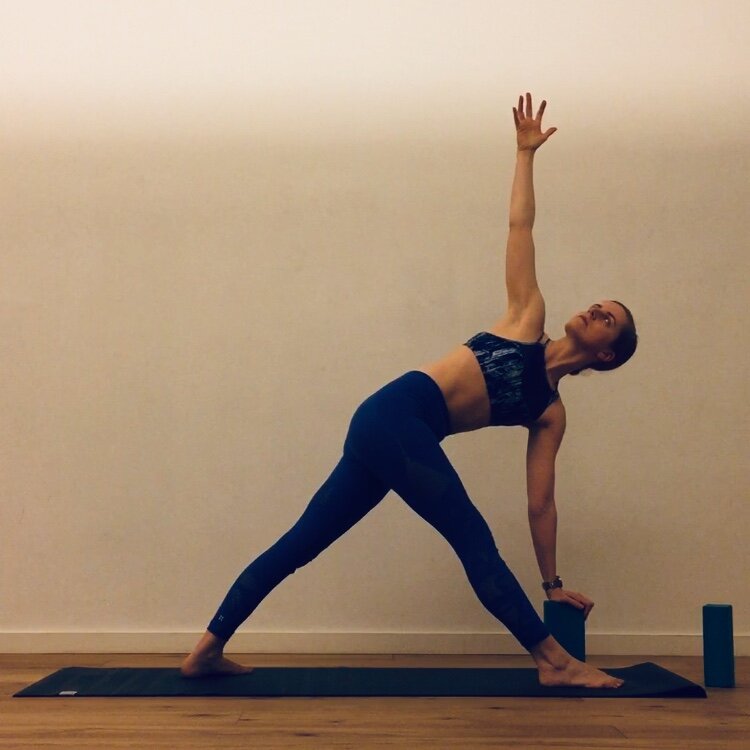
Lounge lizard to modified side plank: I’m not sure if the posture in the first of these images has a common name (but I call it lounge lizard!). Notice how both my feet are pointing in the same direction, which would be parallel with the short edge of my mat if I was using one. I’m also not sitting on the floor, my hips are hovering and I’m feeling a stretch along the outside of my bottom hip and in that side of my waist and ribs. Inhale into the bottom side of your torso, then as you exhale keep your feet as they are and push up into the version of side plank show in the next image. For extra length in the top side of your body you can reach your arm alongside your ear like. Move between these two postures a few times, in time with slow steady breathing.

IMG_0106.jpg

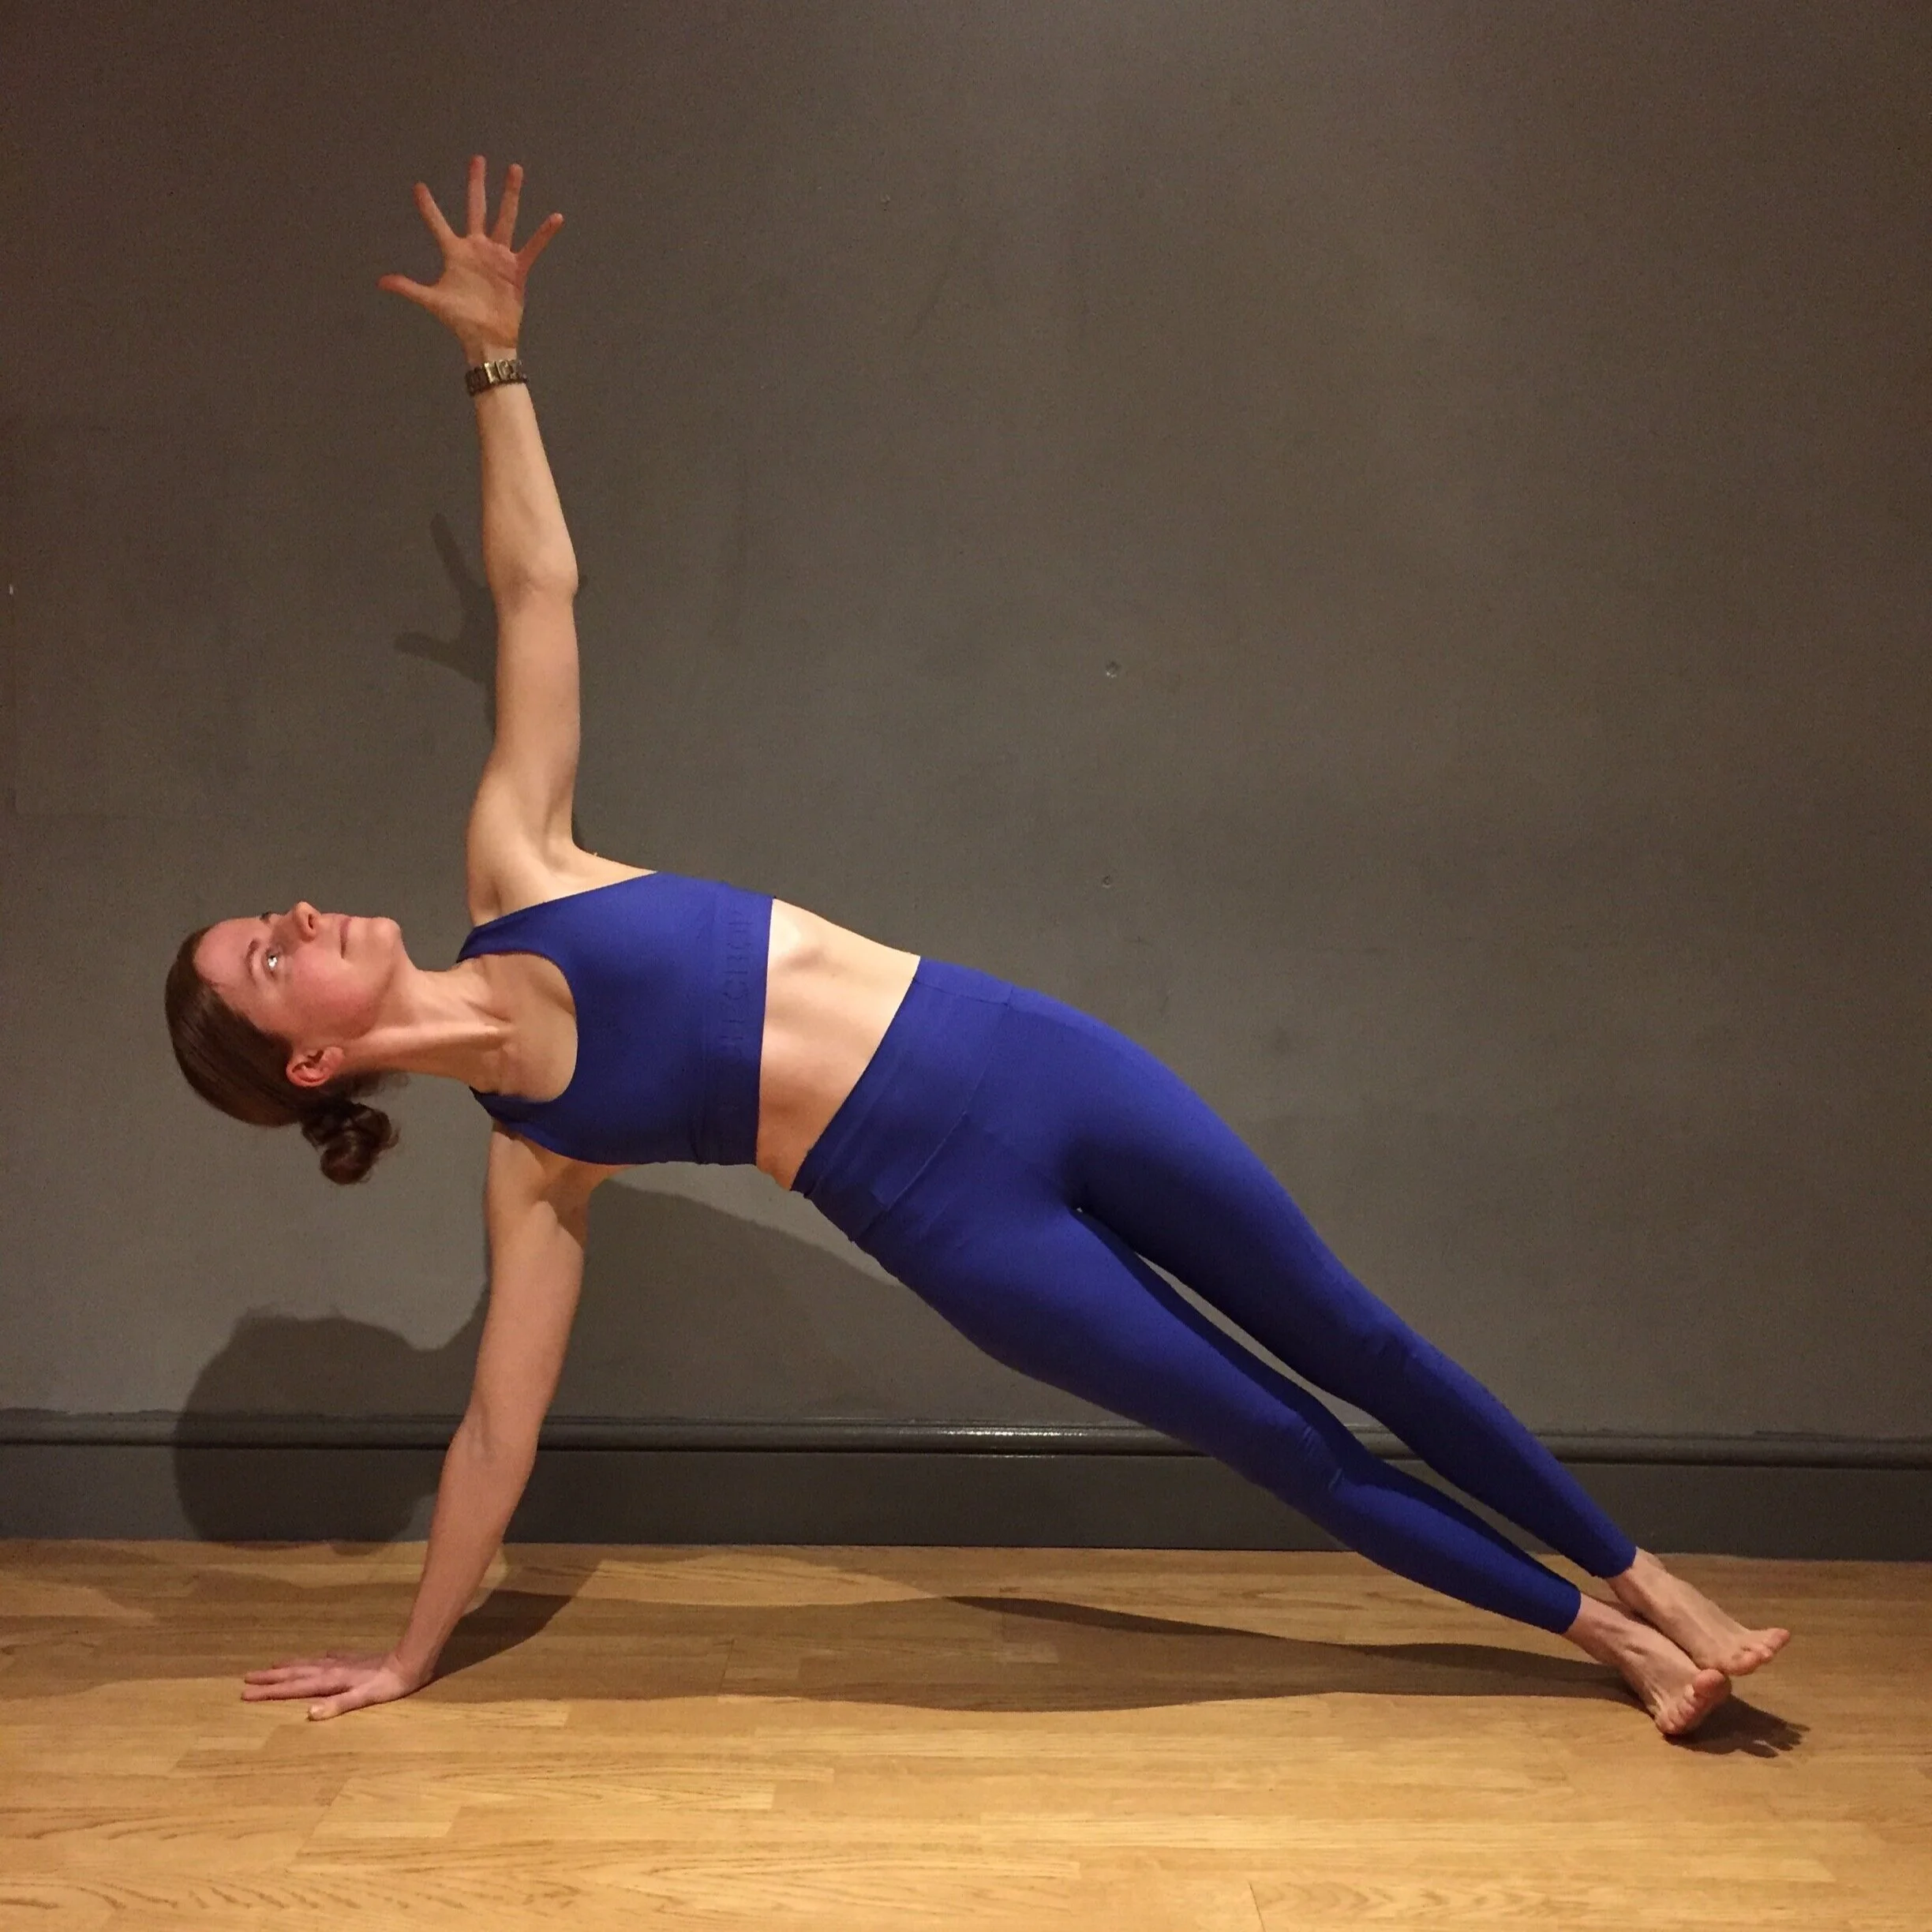
Side plank: you can see here I’m lifting my hips a little higher than they would be if my body was in a perfectly straight line. I like doing that because it feels like it works the side of my waist and outer hip more to lift me higher. Make sure your bottom shoulder stays happy by shrugging it down your back away from your ear.

@yogawitholivia bananasana

Again I’m not sure if this posture has a name - I’ve heard it called bananasana 🍌. Whatever it’s called, this is a nice gentle way to stretch out all the tissues in the sides of your body . 

Yoga for core strength and awareness part 1: deep core muscles

Olivia Marley

This month we’ve shifted our attention in class to the topic of ‘core’. And we’re approaching it in two ways:

@yogawitholivia core.jpg
  • trying to feel and use the muscles in and around your waistline

  • focusing on breathing, which is core to this discipline (and to me is one of the things that differentiates a physical yoga practice from lots of other exercise disciplines).

As I’ve been announcing in class that we’re going to be looking at core there have been a few groans. That’s normal! I think that could be at least in part because people’s experience of their core muscles can sometimes be just the bit you feel when you do sit ups. Since your torso isn’t flat, it’s more cylinder shaped (see first image here), we’ll instead be trying to take a more balanced approach by feeling muscles in your front, back and sides. And we’re starting this topic this week by trying to access some of the deepest muscles of your core: some that run alongside your spine; your pelvic floor; some deep (and high up) inner thigh muscles; and your hip flexors (see second image).

Within the flow of each class, here are some ways we’ve been trying to feel those parts of your body:

@yogawitholivia hip flexors.jpg
  • lie on your front and lift your head, chest and legs away from the floor. Feel muscles in your back fire up to lift you

  • imagine you were on the loo doing a wee and you wanted to stop partway through. There’s an idea of what pelvic floor feels like! We’ve been building that into class by taking long steady breaths and at the end of each exhale drawing pelvic floor and lower belly in and up a little

  • put a yoga block (or book/ cushion etc) between your legs and squeeze. Feel your inner things switch on. Bring that sensation into postures like downward dog, warrior 2 and warrior 3

  • come into a lunge with your back knee on the floor. Press your back foot down and see if you can feel the front of that thigh switch on. Then (without actually moving your knee) that you’re trying to drag your back knee forwards towards your front foot. If you feel something working around the front of that hip, those are your hip flexors.

We’ll continue our focus on this area of your body over the next few weeks by working our way around the front, back and sides of your waist. More blog posts to follow showing how you might approach working with those areas of your body!

Options for arm position in revolved triangle

Olivia Marley

As part of our focus on the warrior one family of postures we’ve been spending a bit of time in this pose, revolved triangle. For most bodies it’s a tough shape to make: it asks for a lot of mobility along the back and outside of your legs and hips; it can be pretty wobbly so hard to maintain your balance; plus it’s a deep twist so it can be hard to breathe in! We already looked at the position of your feet in this family of postures in my last blog post (having feet hip width apart rather than one behind each other is likely to make twisting into revolved triangle more accessible). In addition, to help students find more ease while holding this shape, we’ve been playing around a bit with the position of their arms.

PLACEMENT OF BOTTOM HAND

IMG_9813.jpg

In the first picture here I have my fingertips on the floor on the outside of my front foot, which is the classical set up for revolved triangle. Even though LOTS of other postures don’t, twists naturally come fairly easily for my body and my torso turns enough that I can place my hand on the outside of my leg without having to reach for it too much. But for plenty of other people putting their hand on the outside of their front leg is a real stretch (no pun intended!). Their torso stops turning when their chest is still facing a little to the floor, so instead of just dropping their hand to the floor they have to reach past their leg to get their hand outside their foot - as seen in the second image here. That alignment made my chest feel kind of squashed and it was more difficult to breathe (as if it’s not hard enough to breathe deeply in a twist like this!).

So in class at the moment I’m bringing people into this pose with their bottom hand on the inside of their foot (as in the third image here), and then once everyone’s in the pose offering the option to put their hand on the outside of their foot. And I’d estimate that only about 10-20% of people are taking that option, so presumably the rest prefer having their hand on the inside!

HEIGHT OF BOTTOM HAND

IMG_9810.jpg

I can get my hand on the floor in this pose, but for me using a block on its lowest height feels ideal. For lots of students trying to place their hand on the floor can be a real struggle. Trying to force your hand to the floor can meaning having to round (or in anatomical terms: flex) your spine a lot, which doesn’t set you up for a comfortable or easeful twist that you’re able to breathe in (see photo 2). In the third photo here I’ve placed my bottom hand on a brick, and you can perhaps see how that may enable students to keep their spines straighter and stay a bit broader across their chest as they turn.

TOP ARM

IMG_9811.jpg

It’s really tempting in revolved triangle to throw your top hand back behind you as far as it will go, because it can feel like you’re twisting more. In fact what I often see happening when students do that it is their top shoulder shifts forward and their chest hasn’t actually turned any further (photo 2). So I’ve been cueing students to bring their top hand either directly over their top shoulder or a little forwards (where forwards in these images means towards the camera), and to imagine they’re pressing that palm into something solid like a wall. Then plenty of them have been able to shift their top shoulder a little further back (compare my top shoulder in image 2 to to it in image 3).

This approach is part of one of my wider aims for my students in 2020:

  • Encouraging students to test out slightly different positions within the poses, and to find what works for them

  • Letting go of the need to try and force themselves into a posture that looks a certain way, or of thinking that there’s only one way to do each yoga pose. Different bodies will look different doing the same postures!

Comment below with any questions, thoughts, or with your experience of revolved triangle or warrior 1 🙂