contact us

Use the form on the right to contact us.

You can edit the text in this area, and change where the contact form on the right submits to, by entering edit mode using the modes on the bottom right.


123 Street Avenue, City Town, 99999

(123) 555-6789

email@address.com


You can set your address, phone number, email and site description in the settings tab.
Link to read me page with more information.

used - sukasana.jpg

Blog


Breathing in backbends

Olivia Marley

We’ve started 2019 by focusing on breath, and in particular on the breathing technique called Ujjayi (slow and steady rhythm, with a slight sound in the back of your throat). As my students become more proficient in maintaining that breath, I’ve started to test them by bringing in poses that can be hard to breath in. Among those: backbends.

When you bend backwards, the back side of your body contracts to bring you into that shape (in the same way as when the front side of body contracts it makes you bend forward). There are three main reasons why I think I - and the people I observe in my classes - can find it hard to breathe in these types of postures.

IMG_7218.jpg
  1. Imagine yourself lying on your front and then doing locust pose/ shalabasana or cobra pose/ bhujangasana. The back side of your body contracts to bring you into that shape, but the front side of your body is pressed against the floor. So it can feel like there isn’t much room for your breath to expand in your body

  2. In some other backbends you’re not pressed against the floor but the posture itself is a bigger, more demanding shape. So imagine yourself in perhaps camel pose/ ustrasana or upward facing bow pose/ urdhva dhanurasana. The backside of your body is contracting to bring you into the shape, but the front side might be being so stretched that again it may feel like there’s not any available space for your body to expand when you want to inhale

  3. And lastly, consider the backbends in that short sequence we do over and over again in vinyasa yoga (plank -> lower down -> upward dog, locust, cobra or sphinx -> downward dog). It’s really common to take that backbend too fast, rather than making it last the entire length of a slow inhale.

So out of these, the third has the most obvious solution. Even though it takes way less strength to rush through that sequence quickly, slowing everything down will give you time to breathe in an unhurried way.

The first reason - feeling squashed against the floor - for most people just takes a bit of attention to solve. Even though your belly stays on the floor in those face down backbends your chest lifts. And your breath doesn’t just expand into the front and back of your body, but also the sides. So intentionally directing your breath into your chest and the sides of your ribs (while also moving slowly enough to give yourself time to take a full inhale) should help solve that issue.

So that brings us to the remaining problem of being in such a demanding shape that you can’t help holding your breath. In a discipline that sometimes mistakenly prioritises range of motion over integrity of motion and breath this might seem unsolvable. When in fact it’s super simple. Don’t go so far!

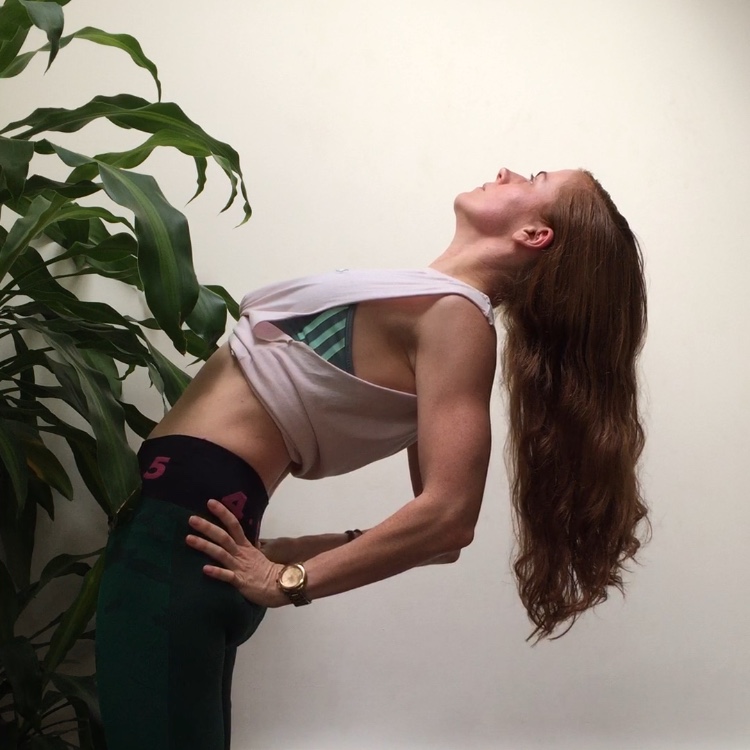
If you’ve practised yoga for a while you’ve more than likely done it: wanted to make a shape with your body so you’ve pushed beyond where you should have. But one of the key features that differentiates this practice from other movement disciplines is mindfulness and breath. If you find yourself in a backbend (or any other posture) and you can’t breathe steadily, try easing out a little. So in the photo above I could go a bit further into the shape but I’d start to find it hard to breathe. Someone else would hit that point in a different place to me, but the same rules still apply no matter what the shape... if you can’t breathe you’ve gone a bit far 🤷🏻‍♀️


shoulder mobility and the shape of your handstand

Olivia Marley

IMG_6863.JPG

We’ve been practising our handstands in class over the past couple of weeks and a few different students have asked me a similar question: "why can’t I get my body in a straight line?".

Sometimes people that make a slightly curved shape in their lower back in handstand (like that you see me making here) are told it's because they need to engage their core more. It's true that if I switched on my abdominal muscles more here it'd move my legs towards the left hand side of this photo. But then I'd probably lose my balance, because my whole body from chest to feet would be tilting to the left. For me (and for many of my students) this body shape in handstand is caused by limited range of motion in the shoulders.

You can see that my chest doesn't go straight up above my arms here - it tilts a little to the left of the photo. That's because my shoulders don't have quite enough range of motion to let me reach my arms straight over my head without also curving a bit in my lower back. They reach almost all the way, run out of mobility in the shoulders and then the last little bit of reach has to come from movement in the rest of my spine. For a lot of people it's actually that curve in the lower back that creates a banana-shaped handstand 🍌 So of course your core muscles are important. They help to make your upper and lower body move as one congruent unit. But shoulder mobility plays a role for lots of people too 🙌🏼

L-pose or handstand prep

Olivia Marley

This blog post is in response to a student who wanted to practice this posture at home. If you're going to give it a go too remember to back off if anything hurts, and if you're at all unsure maybe have someone nearby to spot you the first time you try it! L-Pose is a great way to build your upper strength in preparation for handstand, without having to worry too much about your balance. And if you want to know when we run our next handstand workshop to help you build your confidence and proficiency in this challenging posture send us a message and let us know!

So if you're ready, start on your hands and knees with the soles of your feet flat against a wall....

IMG_4349.PNG

Photo 1: Check that your knees are directly under your hips, and your hands are under your shoulders. You can see that my hands are mistakenly a little too far forward here - it’s much easier if you have a mirror or someone to spot you! Rather than letting your chest sink passively down to the floor, actively push the floor away from you. Activate your core muscles by drawing your lower ribs in towards your spine.

IMG_4350.PNG

Photo 2: keep your hands and feet where they are and come into a slightly odd, too short downward dog at the wall. If you have tighter hamstrings you may have to bend your knees quite a bit.

IMG_4351.PNG

Photo 3: place one foot on the wall at about hip height. If it's too low, your foot will just slide down the wall. And if it's too high you'll end up in a diagonal line rather than the ninety degree angle we're looking for here.

IMG_4352.PNG

Photo 4: actively push your top foot into the wall. In the photo it looks like I'm walking my feet up the wall. But if you look closely, you can see my bottom foot is in mid air. As you push with your top foot, it will send your hips away from the wall and more over your wrists, which will make your bottom foot lift. 

IMG_4353.PNG

Photo 5: place your bottom foot next to your top foot. If you know you're a little tighter in your hamstrings it's completely fine to keep your knees bent a little. Push the wall away with your feet, and the floor away with your hands. You can see that having my hands slightly too far forward when I started has meant they aren't underneath my hips here. If you haven't got a friend nearby to spot you maybe try filming yourself on your phone to check how your upside down 'L' looks!

It's super common for people to take their feet too high and their hands too far forward when they first attempt this posture. That way they end up in a diagonal line (which is fine sometimes, but not what we're after here!). It happens because when you first straighten your legs and send your hips over your hands, if you're not used to being in that position it feels like your hips are going way too far. So moving your hands and feet feels much safer! If that step (shown in photo 4) does freak you out at first, know that it's perfectly valid to just practice that until you feel comfortable. There's never any pressure to come into the full posture until you're ready. And just ask if you have any questions!